
The quick answer
Choose one place to record expenses, add each purchase soon after it happens, use a small set of categories, and review the list once a week. At the end of the month, compare category totals with your budget rather than trying to remember where the money went.
A six-step routine that is easy to keep
- 1
Keep all your expenses in one place
Choose one Android expense tracker as your main place for purchases. When expenses are split between notes, messages, spreadsheets, and several apps, it becomes harder to trust the total.
- 2
Record purchases close to the moment
Add the expense after paying, scan the receipt, or set aside a short evening check. The longer you wait, the easier it is to forget cash purchases, delivery fees, tips, and small recurring costs.
- 3
Keep categories useful and limited
Start with categories that answer real questions: groceries, transport, dining, housing, health, shopping, and subscriptions. Add a new category only when it will change a budget decision. Too many categories create extra work without adding clarity.
- 4
Record how you paid
Connecting an expense to cash, a bank account, a wallet, or a credit card helps explain balance changes. It also makes it easier to spot an expense attached to the wrong account during review.
- 5
Review once a week
Look for missing purchases, duplicates, unclear titles, and unusual categories. A short weekly review is usually easier than repairing a full month at once.
- 6
See what changed this month
Compare categories and budgets, then ask what pushed the total up or down. It may be one large purchase, several small ones, or a recurring charge.
Example: one ordinary day
Suppose you buy breakfast, take a ride, and purchase groceries. You do not need a long note for every transaction. A clean record can look like this:
| Expense | Category | Paid from | Helpful detail |
|---|---|---|---|
| Breakfast | Dining | Cash | No extra note needed |
| Morning ride | Transport | Wallet | Work commute |
| Grocery store | Groceries | Credit card | Receipt scanned |
The titles are understandable, the categories are consistent, and the payment accounts explain where the money came from. That is enough to support a useful weekly or monthly review.
Need a better way to track expenses?
Most expense-tracking systems fall apart because they ask you to do too much every time you spend. A coffee, a grocery receipt, and a monthly bill do not need the same amount of work. Use the quickest method that still leaves you with a record you can trust.
| When this happens | Use this | Keep an eye on |
|---|---|---|
| A quick purchase | Add it manually | Amount, category, and payment account |
| A receipt has several items | Take a receipt photo | Merchant, date, total, and item list |
| A bill returns each month | Use a recurring expense | Due date, amount, and payment account |
| You need something from earlier | Search your history | Title, date, category, or account |
There is no prize for using the same method every time. Type a small purchase yourself. Use a receipt photo when retyping several line items would be tedious. Before saving, check the amount, item categories, and payment account. A scanned receipt saves together under the store name; grouping is optional and is not needed just to report different item categories.
- Keep all spending in one history so you are not comparing different totals.
- Use names you will still understand when you search a month later.
- Record how you paid so changes to cash, cards, and accounts make sense.
- Spend five minutes each week checking categories and budget progress.
If your main goal is staying under a limit, start with how to create a monthly budget on Android. If long or itemized receipts are the part you avoid, follow the receipt-scanning walkthrough.
See how Higxel brings the routine together in its expense tracker for Android.
See the routine in Higxel
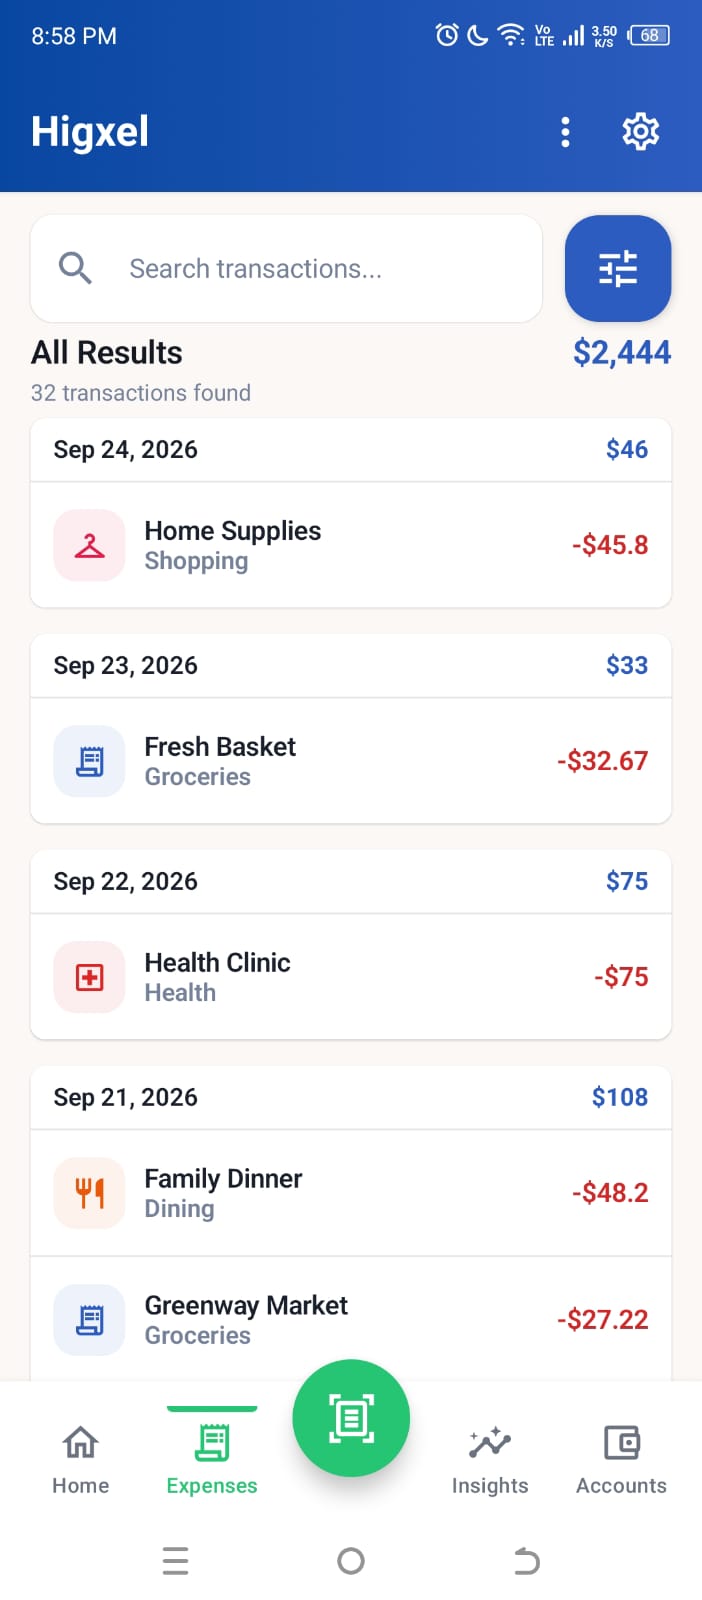
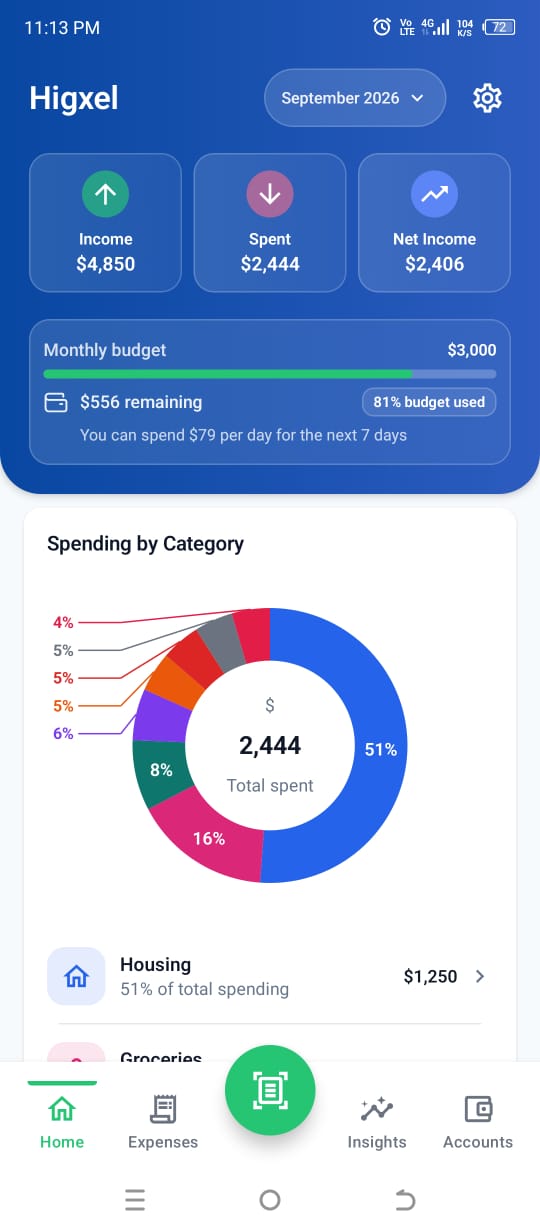
These app examples use sample data rather than customer records. Expense History keeps saved purchases together by date, while Home summarizes monthly spending and shows the category breakdown. That means the daily habit stays focused on recording correctly; the monthly view does the summarizing later.
- Add or scan the expense while the purchase is still easy to recognize.
- Use History to correct unclear titles, categories, or payment accounts.
- Use Insights and budgets for the monthly decision—not for adding more daily work.
Common expense-tracking mistakes
- Waiting until month-end. Small expenses and cash purchases are easy to forget.
- Creating a category for every store. Categories should describe the type of spending, while the merchant or title identifies the store.
- Tracking so much detail that you stop. Collect the fields that help you make decisions; optional notes can stay optional.
- Ignoring refunds and corrections. Update the record when the real transaction changes.
- Looking only at the total. Categories, accounts, and recurring charges explain why the total moved.
How Higxel fits into the routine
Add an expense yourself or begin with a receipt photo. Check the details, item categories, and how you paid, then return to your history whenever you need to fix something. Budgets and monthly insights show where the saved expenses went.
Explore the focused Expense Tracker for Android page, or continue with how to scan receipts on Android.
Install Higxel for Android and start with your first expense.